How low should you squat?
Just because you can get low in a squat, doesn’t mean that you should.
The squat is considered to be one of the best exercises to build total body strength and build muscle.
I’ve always been in awe and even envious of people who can get low enough to touch their butt to their heels in a squat. Are you one of them or are you like me?
That said, I’ve learned that it was a mistake to compare myself to anyone else when it comes to how low they get. And you should take that approach too. Otherwise, your ego can lead you to try squat in a way that harms your body rather than help it.
Too low of a squat causes degeneration in your body and how it functions. And it increases your risk of a debilitative injury in your lower back and knees.
However, if you don’t squat low enough, you may lose out on building strength in areas in which you may be deficient. And miss out on becoming more explosive.
I want to help you get it right. Read on to learn how.
Here are 5 checkpoints to know how low you should squat.
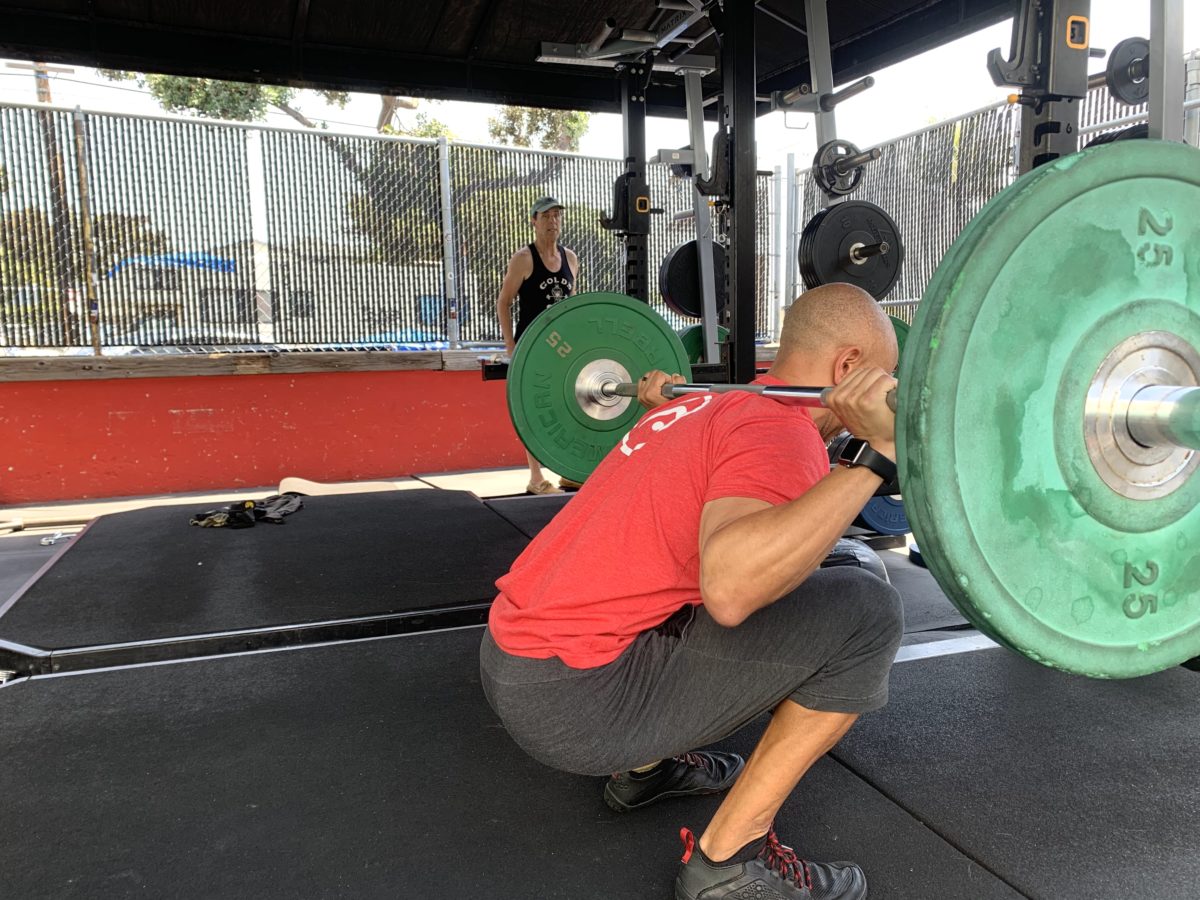
1. Feet
When you squat, all four corners of your feet should be in contact with the ground at all times. This provides the best proprioception (the awareness of the position and movement of your body) and the correct muscle recruitment to build on. In particular, your gluteus maximus (your glutes) has the most activation when you root your heels into the ground.
When you attempt to go lower, it’s more challenging to keep your heels on the ground.
The alignment of your feet should either be straight forward or with a slight rotation outward. It will depend on the structure of your hips and ankles, or restrictions in your mobility.
Either way, your feet should remain steady throughout the depth of your squat. If you find that they splay further out as you go lower, that torque will not help the health of your joints. Stop yourself from going lower at the point this happens for you.
2. Knees
Throughout your squat, both of your knees should remain in alignment within the space between your 2nd and 5th toes on each foot. This allows you to better direct the forces from the ground and gravity to the right muscles.
But going lower in a squat poses greater stress at your hips to stabilize your knees and ankles. And it can magnify a dysfunction you may have developed or an anatomical limitation you may have.
The most common faulty pattern I see is when the knees will cave inward the deeper the squat. When this happens, it will direct the forces from gravity and the ground into the joints of your knees, hips, and lower back. This lack of proper muscle recruitment in your legs and hips not only makes you weaker, but the stress also creates breakdown over time and leads to injury.
3. Lumbo-Pelvis
You should maintain a neutral position in your lower back and hips during your squat to get the most benefit with the least cost. However, a slight anterior (towards the front) pelvic rotation with a slight extension of the lumbar vertebrae (lower back) is acceptable. This may feel more natural and comfortable for many athletes due to their individual anatomy. Either way will help build strong glutes.
It’s important to know that your individual anatomy will dictate how low you can go before you lose form. When that happens, your pelvis will shift to a posterior (towards the back) rotation, and your lower back moves into flexion (a.k.a. the infamous “Buttwink”). This not only compounds the pressure on the disks between your vertebrae, but it also takes your buttocks out of the equation. This means that you have to rely on your quadriceps which can cause them to recruit more in the future. This is not ideal.
4. Thoracic Vertebrae
The thoracic vertebrae span the distance of your ribs from top to bottom. When you are top-loaded with weight during a squat, this area is at its strongest when it is neutral or in slight extension. That stable support is crucial as you get lower into a squat because of the forward lean at your hips.
If your thoracic vertebrae flex forward, then it will create a domino effect of poor positioning and stress on the rest of the vertebrae. Both above and below. Which you want to avoid.
5. Control of all the above
The ability to command stability in all the checkpoints above is the ultimate factor when it comes to how low you should go. And you should be competent on both sides of your body to show symmetry.
When you reach this point, recognize this is your sweet-spot that you aim to find with every repetition. And you can keep quality over quantity.
The baseline point of control is that you must have the strength to stand back up from the depth that you go. If not, I hope you have a spotter and some humility. lol
Regain control with intelligent progression
With each of the areas above, you can work on isolated mobility in the ankles, hips, and thoracic spine. As they improve, you can then integrate the gained mobility and stability from the isolated work into the squat using progressive overload. But you must raise your awareness of each checkpoint by looping through each over-and-over throughout the movement.
Another aspect that you can adjust is the distance between your feet. This can depend on your limb length, the shape of your pelvis, and how the head of your femur is positioned in your pelvis. So a lot of times, standing with a wider base allows for greater depth without compensation from your joints or another muscle group.
Over time though, it’s important to try to reduce the distance between your feet. When you can, you’ll know that you’ve made improvements in your mobility and stability.
Figuring all this out on your own, can be difficult. So it’s important that you get the support you need. I recommend that you ask a friend to observe and film you when you squat. Or you can hire a fitness professional with a trained eye.
And in case you missed it, I’ve created a program called Search & Rescue Mobility (SARM) to give you the peace-of-mind that you’re doing the right things to stay in the game. It starts with a self-assessment that I will score and then assign you what you need to improve. With the program you will receive a daily routine that you can follow right on the Athlete For Life app.
Join the community and get yours here.
As always, stay athletic.
Your coach,
Adam